Categories
Freezer Friendly Gluten Free Keto Low Carb Recipes Slow Cooker

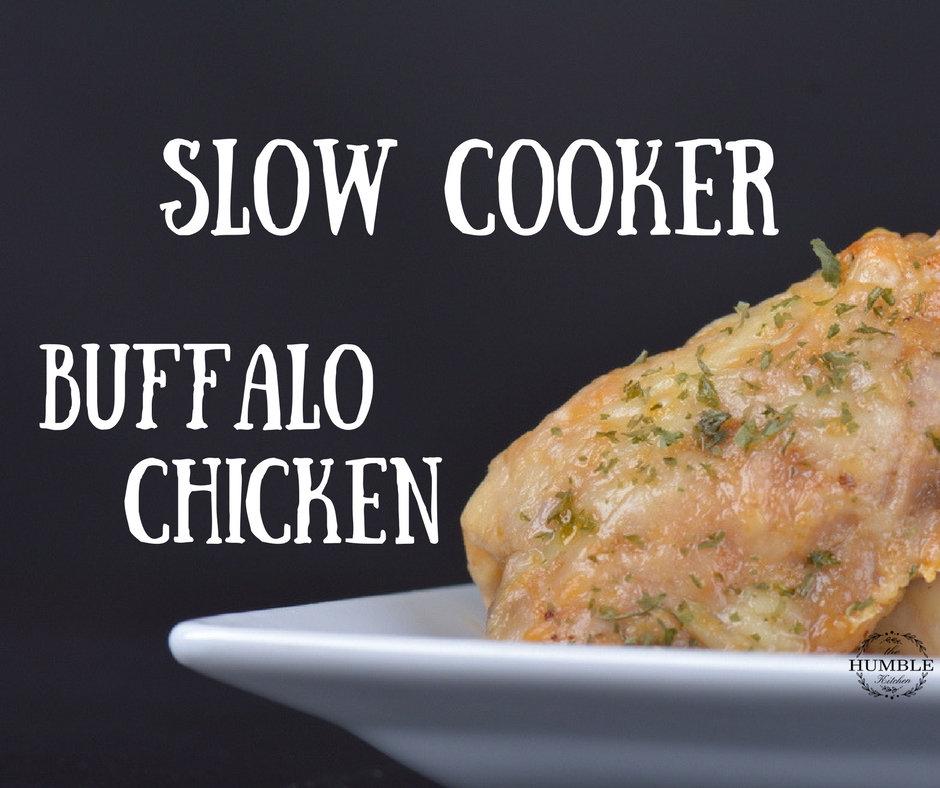
Slow Cooker Buffalo Chicken | Low Carb – Keto Friendly

As the workload gets harder, the house gets messier, and the days seem to get impossibly busier the last thing anyone wants to do is come home and slave over a hot stove (oh, and then proceed to spend another 20 minutes washing dishes -don’t even get me started).

My slow cooker has been my knight in shining armor on busy days like these for years… that is until I broke it while scrubbing it in the sink shortly after making this recipe.

As if I needed yet another reason to hate doing dishes.

Admittedly, I stared heartbroken at my shattered dinner hero for several minutes (all while wondering to myself why bad things happen to good people)  before finally moving it to its final resting place -the trash. So… I’m just saying that if you’ve ever been even mildly curious about trying flavored gourmet sea salts first hand, now’s a good time. Momma needs a new slow cooker.

But I digress, let’s not drag on with the (albeit overdramatic) sad stuff. As one last tribute to my lost dinner helper, let’s turn up “Want You Back” by the Jackson 5 and just get right into it!

Want to turn up the heat?

Substitute the mineral sea salt with a sea salt that definitely packs a punch. Try Bold Jalapeno for a gentle heat, Prairie Fire for a dish that’s hot and smokey, Diablo’s Ghost if you don’t mind sweating while you eat, or go one step further and try our hottest salt to date: Hell Fire!


That’s all there is to this incredibly simple, tantalizingly spicy slow cooker buffalo chicken. All that’s left to do now is to sit back, relax, binge some Netflix, and enjoy the rest of your evening.

Health & Happiness,

Savannah


Categories
Recipes

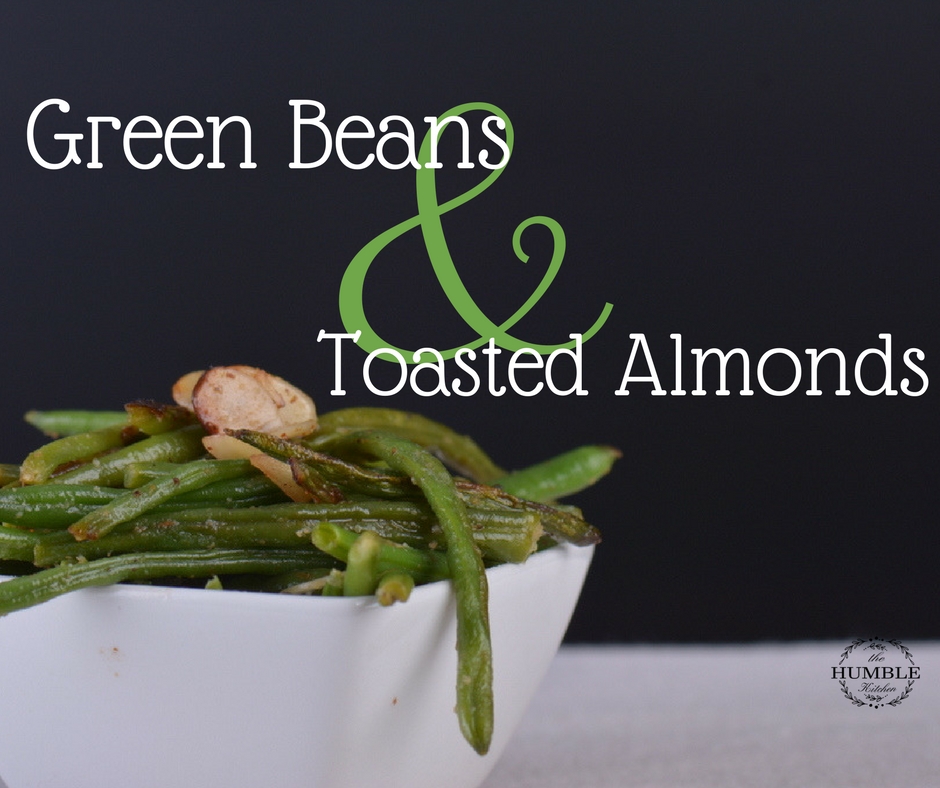
Green Beans With Toasted Almonds

When weekday dinners aren’t the bane of my existence… weekday side dishes are.

It always seems like the same rotating selection of 3 different dishes made to get your family to at least pretend they’re eating a couple of vegetables. Of course -let’s not kid ourselves here, green beans are the furthest thing from spicing up weekday dinners… but at least you get to arm yourself with another side dish for your roster.

Sometimes it’s the little things, like discovering a new recipe for supper that can make a long weekday night even a little bit better.

So despite being a rather uneventful dish, we can at least be grateful that this recipe is incredibly easy, fast (and my favorite part) relatively hands off -which means less stirring time and more time spent awkward kitchen dancing to “Dancing With The Devil’s Daughter” by Jo Hikk

Are you ready?

Lets get started.


Serves: 5      Prep Time: 5 minutes    Cook Time: 5 minutes

  • 3 cups of green beans (fresh is best, but I just opted for what I had -which was frozen)
  • 1/4 cup of slivered almonds
  • 1 tablespoon of butter
  • 1/2 teaspoon of minced garlic
  • A pinch of Himalayan Pink or Sel Gris Sea Salt

Looking for a different taste?

Try substituting regular mineral salt with Bold Jalapeno, Heated Habanero, or Diablo’s Ghost Sea Salt for a little extra heat.

Or amplify the garlic by using Roasted Garlic Sea Salt or our Tuscan Sun Sea Salt Blend -and then get ready to pucker up!

In a large pan, start by melting the butter over a medium-low heat.

Add the green beans, garlic, onion powder, and sea salt to the pan and stir until the beans are evenly coated.

Sauté the beans until almost tender. This will take just a couple minutes if using fresh beans and approximately… well honestly I don’t know how long it took with the frozen ones.

Too busy busting my awkward two year old dance moves I  suppose!

Once the beans are tender (or once you take a dancing break and realize that you’re still cooking like I did) add in the slivered almonds. Don’t be afraid to add in more for extra crunch!

Continue to sauté the beans until crisp and tender.

Then get ready to dish up, cause you’re done!


There we have it!

A super simple and super speedy green bean side dish to get those extra veggies on your plate!

Health & Happiness,

Savannah

Categories
Recipes

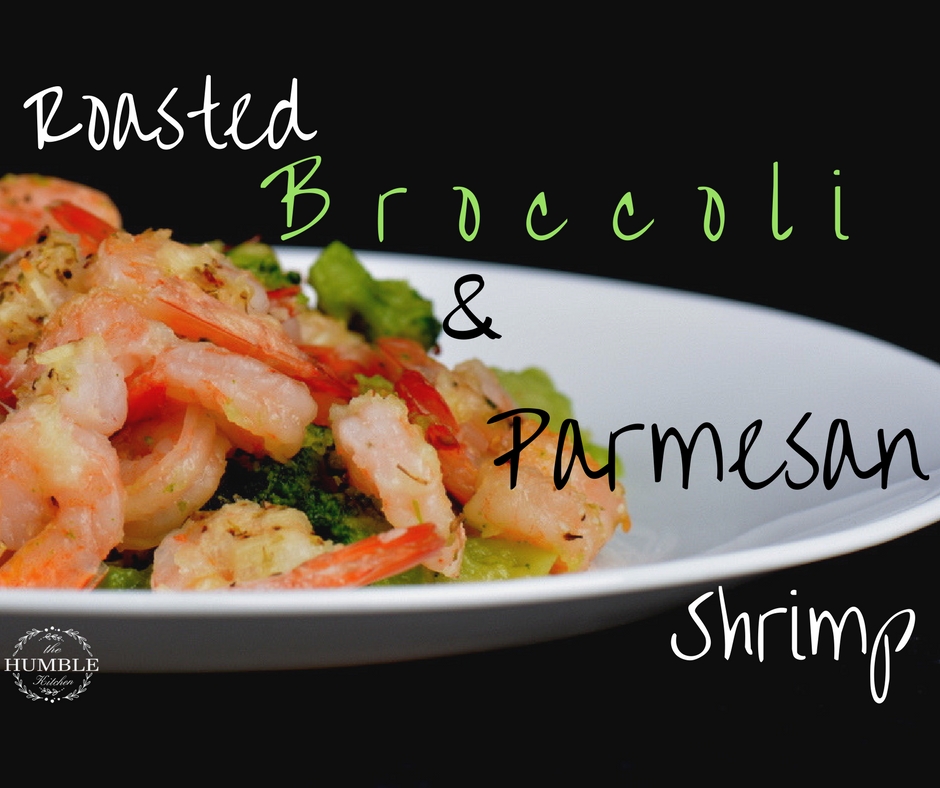
Roasted Broccoli and Parmesan Shrimp Recipe


Calling all Supermoms & Superdads. All Boss Babes and Busy Bees.

Here’s a recipe you’ll want to keep on the back burner -especially when it’s been one of those days…

You know the ones where all you want to do is put your feet up and pour yourself a generous glass of wine or maybe dig into a pint of cookie dough ice cream (I knew I’d be back for you ice cream!). But instead, work kept you late again for the fourth time this week, you barely survive the traffic, you get home and the dogs are barking, the kids are screaming, your house looks like a tornado ripped through it, and you yourself are feeling hangry at best.

Have no fear cause this recipe is ready in less than half an hour so you can get back to what you wanted to do in the first place – put your feet up and binge Netflix

(can I get an amen?)

Pair this with a simple salad, mashed potatoes, or topped on a warm bowl of pasta and you’ve got a winning dish that didn’t leave you slaving over the hot stove. I myself paired this with cauliflower mashed ‘potatoes’ (a recipe that will be coming soon!)

P.S. The shrimp itself (minus the broccoli) makes for an incredibly easy, but savory appetizer.  -Try it and you can thank me later!

Before we get started, there’s just a couple things I want to mention that will make this dish so much easier and tastier than it already is!

  1. To get this show on the road and meal into the oven even faster toss frozen shrimp into a bowl of cold water shrimp in a bowl of cold water BEFORE doing anything else. The shrimp will thaw as you chop the broccoli and prep the baking dish. All you lucky ducks who plan ahead and already have thawed or fresh shrimp can skip this step.
  2. Don’t shy away from the heat. I’m the kind of person who MAJORLY dislikes anything spicy so I was unsure about using chili flakes in this dish. However, in the end I’m extremely glad I did! It gave the dish more flavor with just a gentle touch of heat (one that won’t leave you with your mouth open looking like a panting dog!). If you’re hesitant about spicy foods, I urge you to try just a touch – you wont regret it! Of course, if you’re one of those people who LOVE spicy go crazy and pile it on there!


Alright, that’s enough chit chat – Let’s get on with it! Turn up (what feels like my personal theme song at the moment) “Ain’t No Rest For The Wicked” by Cage The Elephants and let’s get started.

Serves: 4    Prep Time: 5 minutes   Cook Time: 20 minutes   Preheat: 400 degrees

  • 1 (625g) package of shrimp – peeled and deviened
  • 3 1/2 cups of broccoli florets
  • 1/2 cup of parmesan cheese – divided
  • 3 tablespoons of olive oil – divided
  • 1 teaspoon of dried oregano – divided
  • 1 teaspoon of onion powder – divided
  • 1/8 – 1/4 teaspoon of chili flakes – divided
  • Everyday S & P to taste

Looking for a different taste? Instead of Everyday S & P try seasoning your dish using Peppered Citrus, Delightfully Dill, Casually CajunBurnt Timber, Thai Ginger, or Tuscan Sun!

Preheat the oven to 400 degrees Fahrenheight. Then line a baking sheet with aluminum foil and sprayed with non-stick cooking spray to make for an easy cleanup.

In a large bowl toss together broccoli and half of the parmesan, olive oil, oregano, onion powder, and chili flakes. Add salt & pepper to taste. Mix together until the broccoli is evenly coated.

Place broccoli mixture onto the prepared baking sheet and cook for 10 minutes.

While broccoli is cooking, toss together the shrimp and the remaining parmesan, olive oil, oregano, onion powder, and chili flakes. Season with salt & pepper, then toss until the shrimp is evenly coated.

After 10 minutes, remove baking sheet from the oven and carefully add the prepared shrimp. Place back into the oven for 6-9 minutes or until the shrimp is cooked through and opaque.

Then, grab a big plate and dish up cause dinner is served!

That’s all there is to this satisfying parmesan shrimp dish – thats all ready in less than 30 minutes! Now that was easy!

Health & Happiness,

Savannah

Categories
Recipes

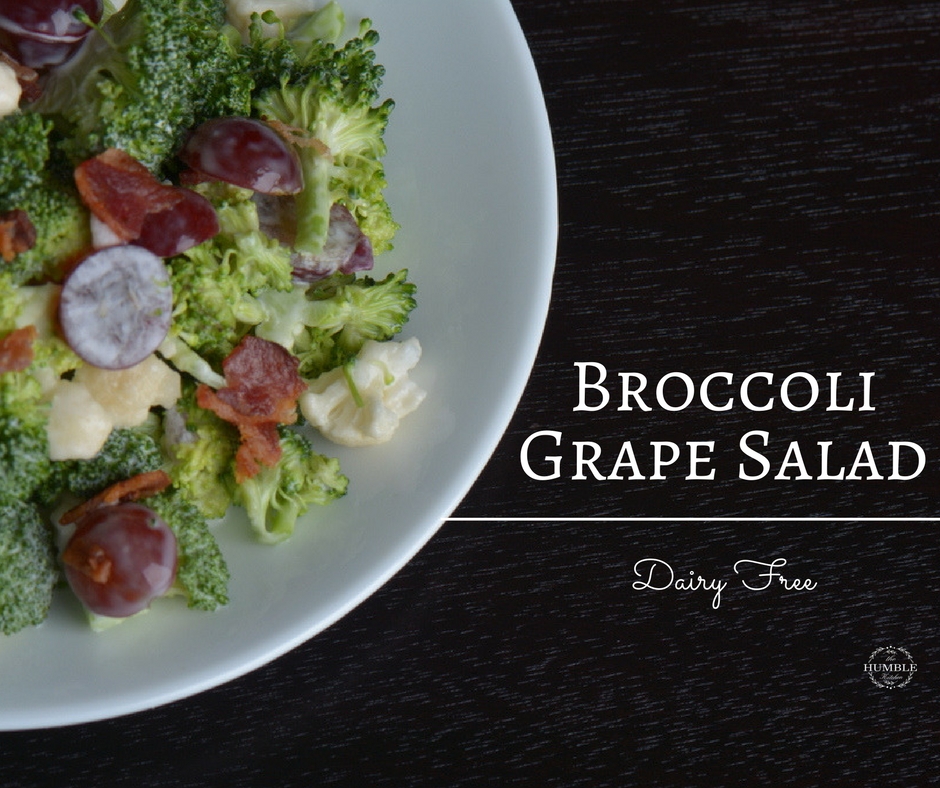
Broccoli Grape Salad Recipe | Dairy Free

As we established back with the Bacon Wrapped Salmoneverything is better with bacon. Even salad. Even broccoli  Watch out broccoli haters, because this little salad is about to change your mind real quick!

This is arguably not the healthiest salad around, thanks to our sugary dressing… but sometimes (in salad, and in life) you just need a little extra sweetness to get through some undesirable situations.

Like eating broccoli.

Okay, I’m only kidding!

In all seriousness, I absolutely love broccoli!

However, as with any kid, when I was little I fought tooth and nail to avoid it… but now that I’m a big kid, I dearly appreciate what that mighty green vegetable has to offer! Like twice the vitamin C of an orange, almost as much calcium as whole milk, not to mention it’s anti-cancer and antiviral properties thanks to our pal selenium!

Yeah. I’ll take one of those, please.

It was actually broccoli salad (not this one specifically, but this recipe was inspired by it!)  that got me eating my broccoli. Looking back, it was likely due to the sugar in the dressing, but hey -it got me hooked! So if you’re a broccoli hater or simply need a little extra sweetness in your day (while still reaping the benefits broccoli has to offer) then turn up “Never Gonna Give You Up” by Rick Astley and let’s get right into it!


Serves: 8   Prep Time: 20 minutes   Total Time: 1 hour 20 minutes

ingredients

  • 16 -20 slices (roughly 1 pound) of bacon, cut into 1-inch pieces
  • 7 cups of fresh broccoli florets
  • 3 cups of cauliflower florets
  • 1 cup of mayonnaise or vegenaise
  • 1 cup of red and/or green seedless grapes, halved
  • 1/2 cup of finely chopped red onion
  • 1/4 cup of sugar
  • 2 tablespoons of red wine vinegar

directions

  1. In a large skillet, cook bacon over medium heat until crisp. Drain bacon on paper towels. Crumble when cool.
  2. In a large bowl, stir together mayonnaise, grapes, red onion, sugar, and vinegar. Add broccoli, cauliflower, two-thirds of the bacon and mix until evenly coated. Place the remaining bacon in the refrigerator.
  3. Cover and chill the salad for at least 1 hour before enjoying.
  4. Sprinkle reserved bacon over the salad just before serving.
  5. Dish up & Enjoy!


Want a savory twist? Try adding just a pinch of Crystal Maldon, Sel Gris, or Himalayan Pink Sea Salt overtop of your salad for that mouthwatering, salty-sweet taste!

There we have it! A beautiful, delicious salad that will leave any broccoli haters wanting more!

Health & Happiness,

Savannah

Categories
Health

What To Expect On An Elimination Diet

I don’t just talk the talk -I walk the walk too.

For the past month and a half I’ve been going through the motions of both keeping a food diary and being on an elimination diet. It was tough at times, and tears were shed, but I wouldn’t change a thing. Thanks to a little bit of perseverance (and a whole lot of daydreaming about ice cream!) I’ve discovered all of my food triggers and (as of now, fingers crossed) my skin is just as clear as it was before that first little patch of itchy red skin appeared over a year ago!

If  that’s not enough incentive to start an elimination diet then I’m not sure what is.

There is a few things that nobody mentions when it comes to elimination diets. From the tears, flares, cravings, healing, (and even losing weight!) I’m here to highlight the highs and the lows of this diet that has changed my life for the better… despite the hardships!


At first, the elimination diet can seem a bit daunting. At least 23 days without fast food, alcohol, dairy, eggs, and gluten (just to name a few!) can make anybody shake in their boots. 

What am I supposed to eat? Am I stuck drinking water and eating ice for a month? I’d rather die.

I thought the same thing, but eventually, everyone finds their breaking point.

Where enough is finally enough, and you refuse to let eczema destroy your life any longer. After this breaking point, it’s easy to push past the fear of starting this (daunting) diet. For me, this breaking point was a day or two after My Terrible Mistake. With my skin (which took weeks to partially heal from the last flare) becoming absolutely destroyed in mere hours, enough was finally enough. I decided I was no longer going to live in fear, clueless about what would absolutely destroy my skin, cause itchy sleepless nights, and what wouldn’t.

Where you take the plunge and vow that for at least 23 days you will keep a food diary and remove the top 8 eczema triggers (plus fast food and alcohol).

Good for you! This step alone deserves a huge pat on the back!

While daunting at first, this seemingly restrictive diet quickly becomes less of a menacing grizzly bear and more like a teddy bear right before your eyes. It is at this stage where you discover that there really is a whole lot of food you can still eat and enjoy!

Push a little further and you’ll see that there is not much food you’ll be lacking -even when it comes to desserts! In fact, I enjoyed many desserts such as ‘Dad’s Goodie Squares(which taste so good you think they must be bad for you!), ‘Choco-la-ti-da‘ (for fondue) and ‘Peanut Butta’ Cookies‘ with no fear of a nasty flare up. Some of these did include nuts (read the ‘Cheater’ section down below for an explanation!) however, there are still plenty of desserts you can enjoy without nuts such as ‘Nice Cream‘ or ‘Gluten and Dairy Free Cookies‘ -so don’t be afraid to experiment!

Besides my killer sweet tooth insisting I eat dessert, common staples for me included fruit, vegetables,salads, chicken, salmon, rice, and smoothies. I ate whenever I wanted, as much as I wanted and never felt like I was lacking. Not once did I ever count calories or portion servings. I listened to my body and ate real  food -mostly plants.

Side note: Words cannot even describe just how much fruit and veggies I ate. It was  A LOT  as they were perfect to grab when you’re feeling hungry right now, when you’re on the go, or when you needed a quick snack!

Of course, at this stage you are also still discovering any hidden sensitivities that don’t consist of the top eight triggers (thanks to your trusty food diary!). For many people this can be anything from nightshades to even herbal tea! So again, keep writing in your food diary.

Note: At this stage, some people’s symptoms actually get worse. Keep at it, and allow your body to get it out of it’s system and it will get better in no time. If there are strong links between what you ate and your flare, remove the suspected food culprit from your diet and  re-introduce it at the end of your  diet once again.

Despite all the yummy and healthy foods you’re eating (and the fact you’re eating as much as you want!) sometimes cravings sneak up. If you’re anything like me, wanting sweets happens at least every other day!

To get through those 23 days (I actually did 30) and the tough cravings I had several tactics:

  1. I made sure to go through my diet one day at a time. “One day.” I would say, “I just have to get through today without eating ___________ (insert: pizza, ice cream, chocolate, bread -you name it) “. Then the next day I would tell myself it again, and again, and again. Focusing on one day rather than 23+ of no naughty (but delicious foods) kept me feeling motivated rather than distraught at how many days I had left.
  2. If my killer sweet tooth really started acting up, I would quiet it down with a serving (or two!) of a tummy safe desserts. Again, I ate what I wanted, as much as I wanted (as long as it was tummy safe of course).
  3. I carried tummy safe food with me at all times. If I got hungry, I wouldn’t be tempted to eat something bad simply because it was there.

Over time as your skin begins to improve, the desire for naughty foods disappears. Choosing between healthy, itch free skin and 20 minutes of naughty foods becomes a no brainer. Eventually I could watch people eat ice cream, cake, pizza, chocolate -you name it and not be fazed.

At some point within your 23 days, one of the biggest obstacles comes to surface: Eating at other people’s homes or perhaps worse, restaurants.

At this stage, eating food you didn’t prepare can feel like a game of Russian Roulette. You don’t know exactly what’s in this food and whether or not it will affect you. On top of it all, having to be the one people have to accommodate for can be awkward and embarrassing. Refusing food a host has made for you or sending food back to the kitchen can make you feel even worse.

Only once during my 30 days did I accidently eat food at a friends house that once again, ruined my hands and destroyed my courage. I wept for hours, and hours, and hours. To this day, I’m not sure what was in it that made me flare but I suspect it was some sort of dairy.

 Even now that I’m off the super restricitive diet -eating at friends homes or restaurants is an intimidating event. Check out this guide on How to Eat At Friends and Loved Ones Homes With Dietary Restrictions for some tips that saved me along the way!

Over the weeks, you’ll notice your skin getting better and better! There really is no better feeling than waking up from a peaceful, itch free sleep, with healthy and happy skin.

As the end of the diet draws near, butterflies of  both delight and fear dance in your stomach.

This stage is Re-introduction, where you learn what foods you can tolerate, and what you must go without. This stage was the scariest, even more so than the Russian Roulette feeling of eating at restaurants.  When you’ve worked so hard getting your skin so clear and itch-free, it becomes very difficult to expose yourself to foods that might make you flare. Alas, to finish the diet and know once and for all the foods we can and can’t tolerate, it must be done. This can be a bit heart breaking, but in the end you’ll be better for it.

For me, fear danced in my stomach more than delight did. So much that I actually put off introducing certain foods like gluten and eggs for a lot longer than I needed to. When I finally did try gluten, I went straight to my favorite bagel that I’ve been missing. That was a BIG mistake, especially because when I finally was ready to try gluten I didn’t even bother reading the ingredients which included my food devil -dairy.

So I ate this bagel I’ve been dearly missing and the very next day bubbles surfaced under my skin. Once again, I cried for hours, and hours, and hours mourning gluten’s part in my life. When I told my mother what happened, she just shook her head and jokingly scolded my choice for re-introduction. She insisted that I try again, this time with a simple bread.

I was scared, but I did. For days I anxiously awaited another flare….but nothing happened. Anxious I tried once more, and nothing surfaced. To my delight, wheat and gluten could once again be added to my diet! That was a hard lesson that reminded me to pay attention to the ingredients.

Dairy was a whole other obstacle and the very last one to be introduced. No surprise, I was terrified. I didn’t want to. I’d seen the damage this devil caused in the past and I wasn’t ready to invite it back to wreak havoc on my body again. So I put it off for days, and days, and days. My mother suggested that if I was gonna go down, might as well eat something I really missed -like icecream.

A plan was born to get a Dairy Queen Cake with the words ‘Doomsday’ written on it and… I almost did it. Again, I got scared. I already knew I was lactose intolerant, and even if I didn’t react eczema wise (like I was 98% sure I would) I didn’t want to suffer the other bodily consequences of eating dairy when you’re lactose intolerant! If you don’t know what I mean… first of all lucky you and second of all… to paint a pretty picture it’s a lot of bloating and poop. Yay…

I didn’t wind up eating dairy, and I don’t regret it at all. My terrible mistake, my lactose intolerance, and my food diary all alluded to the fact that dairy was my culprit.

A couple weeks have gone by and with my skin completely healed (again, fingers crossed it stays this way!) I am one happy girl! I bake and cook with coconut milk, use a coconut butter, and even found a coconut ice cream that is to die for! As for calcium, my sources include dark leafy greens, nuts, chia seeds, and salmon just to name a few. To my delight, a couple of unexpected surprises came out of this whole thing.

First and probably the most important, this habit I developed for eating healthy foods and mostly plants has stuck with me even after the diet. On very, very, very, rare occasions, I reach for something pre-packaged. For the most part though, my diet still consists of fruits, veggies, salmon, chicken, salads, rice, and smoothies… with the welcome addition of eggs, nuts, and wheat!

Second, while eating whatever I wanted -even when indulging in tummy safe desserts I had lost some weight! While I didn’t go on this diet for that purpose, it was a pretty great bonus!

I trust that with my new found habit in place, I’ll keep the pounds off  and keep my skin clear!

You get what you put into this diet. If you cut corners and cheat, this diet isn’t likely to pay off in the way that you hope. In the end, the only person you’re cheating and hurting is yourself.

That being said, I’ll be the first to admit that I cheated too.

I’m only human after all.

However, it’s important to note what I did cheat on. I never decided to have eggs, bread, or milk the one day and then swear off them for the next little while. That is inconsistency and provides inconsistent results. The exact opposite of what we’re trying to achieve here.

On the contrary, I cheated by including an entire group early on. Swearing that as soon as I noticed any flares linked to this food group, I would remove it entirely. The group I included three days after starting my elimination diet was peanuts and nuts. I had never noticed an adverse reaction to them before and I desperately needed some snack fuel that would keep me full for hours when I was busy working or out and about exploring (like going to Ing’s Mine -which was AMAZING!).

So yes, I cheated too. I guess what I’m trying to say is that if you’re going to cheat on this diet, pick an entire food group early on and stick with it. No caving into bread cravings one day and then swearing off of it the next few. But remember, you get what you put into this diet -the more you remove (and the less you cheat) the better!

If this diet didn’t work for you, you need to take a reflect inwards and be 100% honest with yourself. As above, the only person you’re cheating (and hurting!) is yourself.

  • Did you fully commit to staying on the elimination diet?
  • Did you keep up with your food diary and monitor your symptoms? This is particularly important for people who are reacting to foods that are not in the top 8 triggers.
  • Did you refuse cravings to eat off limit foods?

If you answered ‘Yes’ honestly to all of the above, don’t despair. As you are well aware, not everyone with eczema reacts to the same triggers. Perhaps over this diet you found some food sensitivities. Perhaps you didn’t. Perhaps you found some sensitivities and despite avoiding those foods your skin is still worse than ever.

All three scenarios are entirely possible.

Take a deep breath and pat yourself on the back. I know it’s frustrating, but you just completed some major detective work when it comes down to curing your own eczema. Whether you found triggers or not, you are one step closer -even if it doesn’t feel like it.

If your skin is still bad after this whole diet, wipe away those tears and stand up tall. It’s now time to tackle the next eczema monster:

Contact Dermatitis.

An allergist will be able to help immensely with this monster, but in the meantime check out 120 Ingredients Known To Cause Contact Dermatitis and get to throwing out all those irritating soaps, shampoos, and lotions.

In summary, no matter what you choose to do, diet or not. I hope you find health and the end of the road. Just know I’ll be right beside you trying to find the answers too.

Health & Happiness,

Savannah
Categories
Recipes

Spinach Raspberry Salad Recipe

Welcome the sun and warm weather with this sweet and sunny salad! From the bright red berries, the sweet dressing, and the candied almonds -you’re gonna start to wonder how a salad so sweet (and delicious) can be soo good for you!

Salad isn’t supposed to taste this good after all.

But I insist -it is!

All that spinach isn’t just sitting there looking pretty!  Spinach is a major superfood loaded with nutrients important for skin, hair, and bone health. Not only that, I heard that after you eat some you acquire a secret strength… enough to defeat your worst enemies in a single (…okay, a few) punches!

Don’t believe me? Just ask Popeye.

(and if you don’t know what I’m talking about, you definitely need to watch this!). 

If that’s not a good enough reason to eat spinach then I don’t know what is!

So thanks to its valuable nutrients, sweetness (and not to mention the strength acquired after eating spinach), this lovely little salad makes the perfect addition to any meal -from patio lunches to candlelight dinners. Speaking of which, it’s a real easy dish to make your sweetie after they’ve had a long day.

Just a hint-ity hint hint to you romantics out there!

What are we waiting for? Turn up “The Boys of Summer” by Don Henley and let’s get started!

Serves: 8   Prep Time: 15 minutes   Total Time: 15 minutes

  • 1lb (16 ounces, or approximately 10 cups) of baby spinach, washed
  • 2 cups of raspberries, washed
  • 0 – 1/4 cup of red onion, thinly sliced  (depending on how much you want to kiss your sweetie later. I used an 1/8th of a cup  …cause I only kinda wanted to…aha)

  • 1/4 cup of sugar
  • 1/2 cup of olive oil
  • 1/4 cup of red wine vinegar
  • 1/4 teaspoon of paprika

  • 1/2 cup of sliced almonds
  • 2 tablespoons of brown sugar
  • 1 tablespoon of water
  • 1/4 teaspoon of vanilla extract
  • 1/8 teaspoon of Sel Gris or Himalayan Pink Sea Salt (Just a pinch!)

Start with the candied almonds. Begin by combining almonds, brown sugar, water, vanilla, and salt in a small saucepan. Turn the burner to medium heat and  stir constantly for 2-3 minutes or until the almonds are evenly covered and most of the water has boiled off.

Remove from heat and spread out almond slices on a layer of wax paper. Allow to cool while you work on the rest of the salad.

P.s. These make a tasty snack! If you’re anything like me, you’re gonna wanna make extra!

Just a side note: The almonds will be slightly sticky if made right before mixing the salad. I think it’s great, as it sticks to the leafy greens! However, if you don’t want that, make the candied nuts an hour or so before preparing the salad to allow the almonds to cool thoroughly.

In a jar or other container combine sugar, olive oil, vinegar and paprika. Shake well until evenly mixed. Set aside.

In a large bowl combine together all the ingredients that make up the raspberry salad base. Add the dressing and candied almonds. Toss until the leafy greens are evenly coated.

Dish up and enjoy!

Want a savory twist? Try adding just a pinch of Crystal Maldon, Sel Gris, Japanese Matcha, or Himalayan Pink Sea Salt overtop of your salad for that mouthwatering, salty-sweet taste!

There we go! That’s all there is to this beautiful summer salad. As with the Smashed Blackberry Salad, this dish is best enjoyed outside in the sunshine!

Health & Happiness,

Savannah

Categories
Recipes

Lilac Lemon Salad

Remember how I said that playing with berries was the best part of summer dishes?

I was wrong. I was dead wrong.

Playing with the flavors of berries is one thing…but playing with flowers in dishes is a whole new experience. Mere hours before creating this dish I tasted my very first flower. I was swept up in childlike wonder. My eyes suddenly opened to this whole new world that was there the whole time. A well-kept secret hidden in plain sight.

I was absolutely awestruck.

The possibility of combining two of my favorite things fueled a passion I’ve never felt before. Hours in the kitchen felt like minutes and before I knew it this beautiful salad was born. Lilacs naturally have a distinct lemony taste with pungent overtones, so I paired the lovely lemony flower with very mild vegetables and poured a lemon dressing over top. I wanted lemon to be the star of the show, and to my delight, it shined so brightly that (even days later) I can’t help but smile when thinking about this little summer salad.

A little side note on the lemon in this salad. My family is obsessed with lemon, we like flavor and love it when our salad packs a punch. I adapted the lemon dressing from Jamie Oliver’s Garden Salad, adding more than one of the most recognized chef’s out there and it still wasn’t enough. We ended up doing 5 tablespoons of lemon in the dressing to please our taste buds, but you do you!

Playing and experimenting with your food is the greatest part of cooking. Start with three tablespoons and slowly add more from there to make your taste buds happy. You can’t go wrong as long as you listen to your tummy, I promise!

As far as I can tell, there is no other salad quite like this one. A secret between just you and me. I know you’re ready to get right into it however, there are a few key points we must go over about cooking with flowers before we can get started.

  • Be absolutely sure what kind of flower you’ve got ready to pop in your mouth. Not all flowers are edible and can be poisonous. If you’ve got any doubt at all about the kind of flower you’ve got DON’T eat it!
  • Never eat flowers found by a roadway or a park. Roadway flowers are often covered in dust and exhaust from passing vehicles. As for parks, you never know if they’ve been sprayed with pesticides. Don’t risk it. Pesticides aren’t good for people.
  • Never eat flowers you pick up from a store or nursery unless you know for certain that they are guaranteed pesticide free. Again, pesticides aren’t good for people.

While I can’t say what pesticides were sprayed on most nursery flowers  (if any), just know that pesticides once sprayed on a plant don’t last forever. Check out this link here to find out the half-life of some pesticides. Five half-lives is deemed safe for consumption (eg. if a half-life was deemed 7 days, you could arguably eat it in 35 days). A scary topic I know, but just think about what’s sprayed on wheat and vegetables you buy that follow the same rule. 

So what I’m trying to say, even if you did buy perennials from your local store years or several months ago -you’re likely good to go! My own lilacs were bought from a nursery over eight years ago! Of course, I am by no means an expert in pesticides, so if you know any different please let me know! 

  • Growing edible flowers from seed are the safest way to enjoy edible flowers without worrying about pesticides.
  • If you’re new to eating flowers, eat only small amounts (Don’t worry, the amount in this salad is small. I got you covered. I’m a flower newbie too). For most people eating edible flowers is fine, but for some -especially those with allergies and food sensitivities there is a small chance of flowers causing an allergic reaction.

Whew. That was a lot. Are you still there? Hopefully I didn’t scare you off.

This really is a delightful salad and I’d hate to have you avoid it out of fear. Eating flowers isn’t that scary so long as you know where they came from and that you’ve certainly got the right kind! So if you’re ready to enjoy a secret that the majority of the world is too slow to catch up on turn up “Walkin’ In Memphis” by Marc Cohn and let’s get started!

Serves: 6   Prep Time: 15 minutes   Total Time: 15 minutes

  • 5 oz (approximately 5 cups) of baby mixed greens, washed
  • 1/2 a cucumber, sliced and quartered
  • 3/4 cup of cauliflower, chopped
  • 2 tablespoons of lilac flowers

  • 3 -6+ tablespoons of lemon juice
  • 6 tablespoons of olive oil
  • 1 teaspoon of dried oregano
  • 1/4 teaspoon of Rosemary Sea Salt, Sel Gris, or Himalayan Pink Sea Salt 

In a large bowl combine the washed baby greens, quartered cucumber, and cauliflower chopped as thinly as desired. Set aside.

In a jar or other sealed container combine lemon juice, olive oil, oregano, and sea salt. Shake until well mixed. Be sure to start with 3 tablespoons of lemon juice and dip a leafy green into your dressing to try it. Add more lemon slowly, shaking and trying the dressing each time you add more until you’ve reached your desired ‘lemon-y ness’.

Now that you’re happy with your dressing, it’s time to move on to the best part… the lilacs!

Pick a few branches off your lilac bush and don’t be afraid to pick more than you need! The extra branches make a perfect (not to mention beautiful) centerpiece at the table – especially for this meal.

Before we start picking the flowers off, fill up a small dish with cold water. This will keep the flowerheads from drooping or wilting while you pick the rest.

Grab a branch and gently remove the delicate flowers by grabbing the base of the flowerhead and pulling upwards. Place each removed flower in the cold water,  repeating until you’ve got two tablespoons of flowers. Rinse and drain the flowers thoroughly. Set aside.

Put the rest of the branches in a vase or mason jar on the table.

Toss together the dressing and the salad. Sprinkle the delicate lilacs overtop of your fresh greens, then dish up and enjoy your summer salad!

That’s all there is to this absolutely stunning summer salad!

Health & Happiness,

Savannah

Categories
Recipes

Banana Pancakes | Dairy Free

Create the perfect start to your Sunday morning (or any morning) with these 3 ingredient pancakes that are dairy free, egg free, and my favorite -guilt free! At least the last one is what I tell myself so I don’t feel bad when I eat all of them…

I played with a couple methods with this one, with the largest difference I tackled being grinding the oats vs not grinding the oats. The ground oats, as expected yielded banana pancakes that almost looked and tasted like the traditional pancake. Score! These make the perfect substitution for those poor unfortunate souls who have to be careful of dairy, eggs, and even gluten -if you use gluten-free rolled oats, of course!

On the flip side, at first bite, the whole rolled oats tasted (almost) like biting into a warm blueberry oatmeal cookie. Now that’s the perfect way to start a morning! Although, if you’re going for presentation I’d avoid these ones. They were (and still are) referred to as my “Ugly Duckling” because no matter how hard I tried they always looked pretty bad. Delicious, extremely filling, but ugly… At least they tasted kinda like oatmeal cookies, so that’s good news for us who want to skip a step and avoid washing the blender -am I right?!

Just kidding, I still had to wash the damn thing when I made the blueberry maple syrup (but it was worth it, I promise!).

Honestly, it’s entirely up to you whether you keep the oats whole or grind them up,  but just know that you can’t go wrong either way (worst case scenario you wind up with a couple ugly ducklings!).

So what are we waiting for? Turn up “I’m On Fire” by Bruce Springsteen and let’s get right into it!

Serves: 2-3   Prep Time: 5 minutes   Total Time: 15 minutes

  • 2 bananas, ripe or overripe
  • 1 cup of rolled oats
  • 1/2 cup of coconut or almond milk

In a blender or food processor, grind oats until a flour forms (or leave the rolled oats whole for more texture!). Set aside.

In a bowl, mash bananas with a fork until creamy. Add the ground oats and coconut milk to the bowl and mix the ingredients until smooth. I find a handheld mixer works the best for this.

Over medium heat pour roughly 1/4 cup of the batter onto the heated pan and cook for 4 minutes or until the underside of the pancake begins to brown. Flip pancake and cook until both sides are golden brown, roughly another 4 minutes.

Repeat with the rest of the batter then top your pancakes with maple syrup, nut butter, cinnamon, chocolate chips, fruit, blueberry maple syrup, or anything else your little heart desires!

Dish up & enjoy!

  • 1/2 cup of blueberries (frozen works too!)
  • 1/4 cup of maple syrup
  • 2 tablespoons  of water

Combine ingredients in a blender and mix until smooth.

Drizzle over your banana pancakes -then dish up!

That’s all there is to these simple, filling, 3 ingredient pancakes. Enjoy these every day or as a perfect addition to the weekend family brunch!

Health & Happiness,

Savannah

Categories
Recipes

Smashed Blackberry Salad

The best part of summer dishes is being able to play with ingredients that are once again back in season. Nothing says summer like sunshine and the sweet, large berries that accompany it! So it should come as no surprise that this sweet blackberry salad has summer written all over it. It’s healthy, easy, and delicious so you can spend less time cooking and more time doing what you love -enjoying the sunshine!

Just between you and me, this salad can also become an entire healthy (and satisfying) entree by topping your salad with grilled, chopped chicken breast. While we will be focusing on just the salad for this recipe, don’t be afraid to try it later on!

What are we waiting for? Turn up “Summer of 69” by Bryan Adams and let’s just get right into it!

Serves: 6  Prep Time: 10 minutes   Total Time: 10 minutes

  • 8oz (roughly 5 cups) of baby spinach or baby greens
  • 2 cups of blackberries, washed
  • 1/2 cup of feta
  • 1/2 cup of grape tomatoes, halved
  • 1/2 a red onion, thinly chopped

  • 1/2 cup of pecans, halved or sliced almonds
  • 1 tablespoon water
  • 1 tablespoon brown sugar
  • 1/8 teaspoon of Himalayan Pink or Sel Gris Sea Salt (Just a pinch!)
  • 1/8 teaspoon vanilla extract

  • 2 cups of blackberries
  • 1 cup of balsamic vinegar
  • 1/2 cup of plain yogurt
  • 1 tablespoon of sugar


For the candied pecans: In a medium saucepan toss in the pecans or almonds, sugar, water, vanilla, and salt. Turn the burner to medium heat and stir constantly for 2-3 minutes until the nuts are evenly coated and most of the water has boiled off.

Remove from heat and spread nuts out evenly on a layer of wax paper. Allow to cool while you work on the rest of the salad.

P.s. These make a tasty snack too, if you’re anything like me -you’ll wanna make extra!

*The pecans or almonds will be slightly sticky if made right before mixing the salad. I think it’s great, as it sticks to the leafy greens! However, if you don’t want that, make the candied nuts an hour or so before preparing the salad to allow pecans to cool thoroughly.

For the dressing: In a blender, pulse blackberries and balsamic vinegar together until well mixed. Pour mixture into a fine mesh strainer to separate the seeds from the rest blackberry juices.

In a jar or other container with a lid, combine the (seed-free) blackberry and balsamic vinegar mixture with the plain yogurt and sugar. Shake until well mixed.

For the finale: In a large bowl, mix together all the ingredients that make up the smashed blackberry base. Add the candied pecans or almonds, dressing, and toss together until the salad is thoroughly coated.

Dish up and enjoy!

There we have it! A deliciously sweet, summer blackberry salad. Enjoy!

Health & Happiness,

Savannah

Categories
Recipes

Roasted Garlic and Rosemary Mashed Potatoes

Long gone are the days of boring mashed potatoes! These roasted garlic and rosemary mashed potatoes will turn a once simple side dish into an elegant addition to your main meal. The best part? They take only two or three minutes longer to prepare and you’ve got fancy, restaurant-worthy potatoes that your family will love.

What are we waiting for? Turn up “Galway Girl” by Ed Sheeran and let’s get right into it!

Serves: 4   Prep Time: 10 minutes   Total Time: 35 minutes


or


  • 1/4 cup of milk, coconut milk, or whipping cream (whipping cream sounds crazy, I know. But it makes the potatoes even richer, what more do you want me to say?)

Wash and dice potatoes. If desired, peel potatoes before dicing. I tell my family that the reason I leave the skin on is because of the added nutrients and vitamins in the skin, but the truth is I’m far simply far too lazy to peel them (Shh! Don’t tell anyone!).

In a large pot combine diced potatoes, rosemary, minced garlic, salt, and pepper.

Top the pot off with enough cold water so that the potatoes are covered by an inch of water.

Turn the burner on high and bring the water to a boil. Sit back and relax. A watched pot never boils, remember? At least that’s what I tell my family too. Once it’s boiling, turn the burner down to low, cover the pot and let the flavors infuse for 15-20 minutes or until the potatoes are easily pierced with a fork.

Drain and mash the potatoes with a potato masher. Mix in butter or milk until the potatoes have reached a smooth consistency. Try to avoid over mixing, or the potatoes will turn out gluey.

Dish up and enjoy!

That’s all there is to this simple rosemary mashed potato recipe that spices up the plain old side dish and delight your taste buds. Enjoy!

Health & Happiness,

Savannah