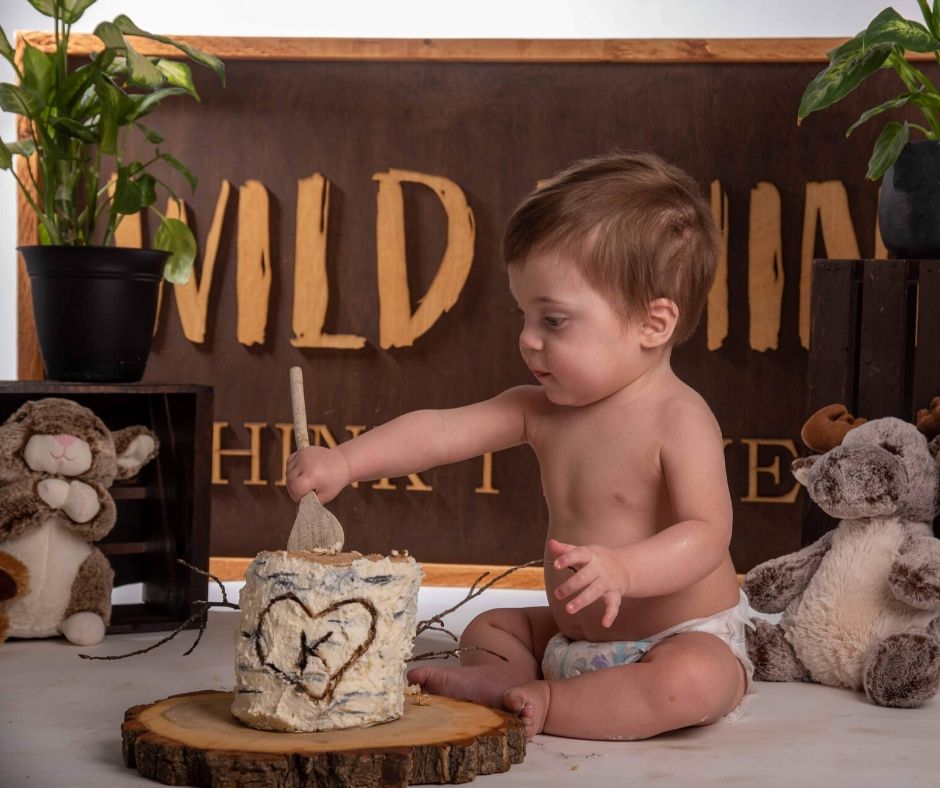
All my childhood I’ve been somewhat of a baker. I remember creating coffee mocha cakes, brownies, and cookies of every kind. And in what seems to be a cruel turn of events, everything I once loved to bake -I can no longer eat. So you can imagine my bittersweet delight when I was able to go back to my roots and make an actual cake -with flour. This particular cake I actually made for my son’s first birthday and his wild one themed cake smash.
I’ve been out of the cake game for a long time, so honestly I’m a bit of a rookie when it comes to them now. I’m not used to measuring properly. I’m not used to following directions exactly, or following those strict rules that promise a perfect cake in return. But luckily for us, there is no such thing as perfection when it comes to birch tree cakes …and I think that’s what makes them so wonderful! So what if your birch tree cake is leaning a little? Or it’s got some weird marks on it? Or it flat out fell over? Now its a log cake – embrace it.
Wanna get right into it? Jump to the Recipe
Before we get started, there are just a couple things you’ll need that will make creating this cake so much easier.
Steps For a Good Crumb Coat
A crumb coat is a thin layer of frosting that traps stray cake crumbs, helps fill in any gaps between the cake layers to create a smoother working surface, and keeps loose crumbs from ‘messing up’ your final frosting coat.
For best results:
- Make sure the cake is completely cooled; a hot cake will melt the frosting.
- You can use any kind of buttercream frosting to crumb coat your cake, as long as it is thin enough that it won’t tug and break the cake’s surface.
- Work from a separate bowl when crumb coating. This way you can avoid crumbs into the frosting you’ll use for the final, perfect coat.
- Don’t worry about visible crumbs or a ‘uneven’ coat. This layer should be thing enough to see the cake and crumbs through it. Just smooth the frosting as best as you can, and let chill before applying the final layer of frosting.
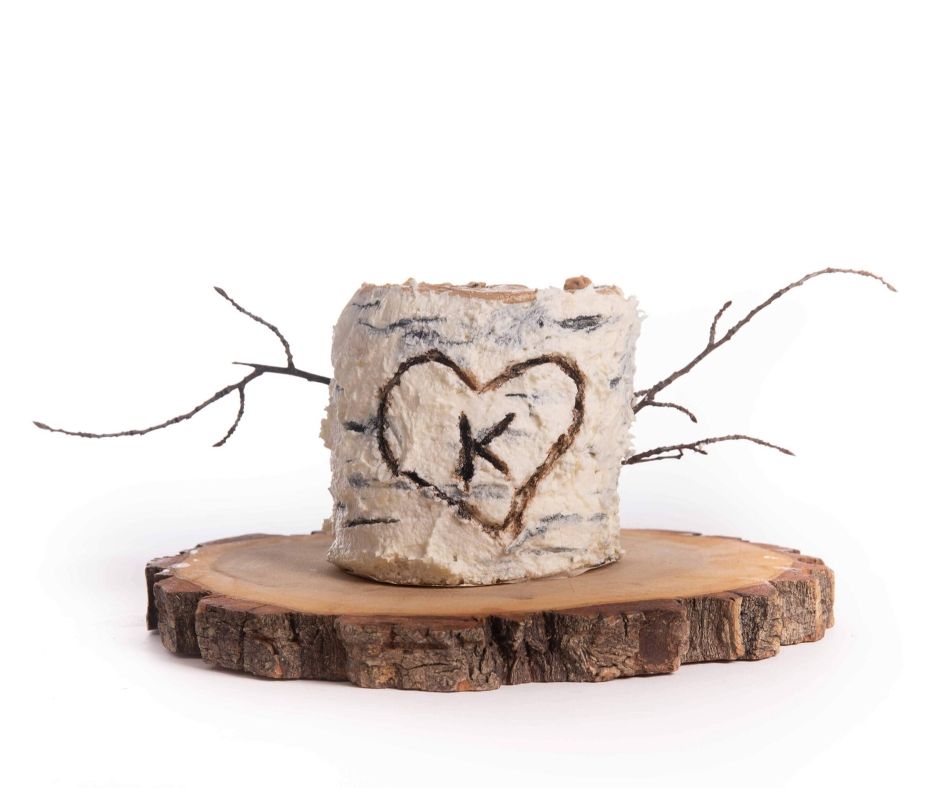
Decorating A Birch Tree Cake
There is no right or wrong way to create these patterns and lines, but here is what I found helped along the way:
- Pull up a reference photo.
- Let this be your guide. Having a reference will help you get a feel for the patterns, marks, and distinct ‘eyes’ of the birch tree.
- Don’t smooth the cake.
- Birch trees are rough and have texture. Mimic this by leaving the cake a little rougher around the edges.
- Use a toothpick or a paintbrush.
- A little gel food colouring goes a long way, and the black pigment in particiular is exceptionally strong. Even the finest of lines get exponentially larger when touched and smudged. Go slow, you can always add more colour later.
- Let nature play a part.
- Gather and wash some small sticks, wrap the ends in plastic wrap and stick them into the cake for a pinch of realism.
- Add personal touches.
- A ‘carved’ heart, initials, arrows – the possibilities are endless!
Birch Tree Cake With Buttercream Frosting
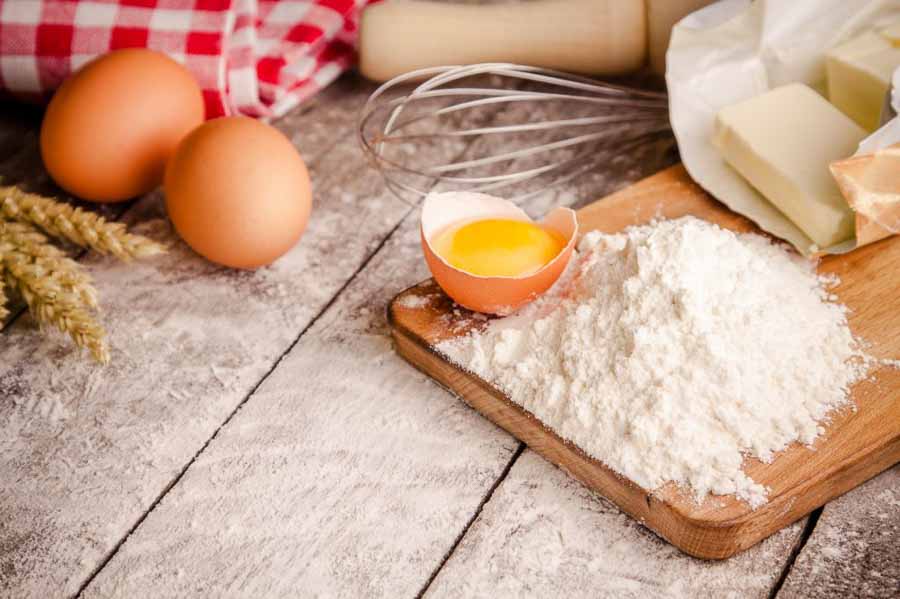
Ingredients
Maple White Cake
- 2 ¼ cups all purpose flour
- 2 ¼ tsp baking powder
- ½ tsp salt
- ¾ cup butter room temperature
- 1 ½ cup granulated sugar
- 3 large eggs
- 1 ½ tsp maple extract
- 1 cup buttermilk
Maple Buttercream Frosting
- 6 large egg whites
- 1 ½ cups granulated sugar
- 2 cups salted butter
- 2 tsp maple extract
Decorations & Assembly
- small twigs & sticks
- brown & black gel food colouring
Instructions
Maple White Cake
- Preheat oven to 350°F. Grease a 9×13 inch glass baking dish (are my cake pros screaming yet?).
- In a medium bowl, whisk together flour, baking powder, and salt until well combined. Set aside.
- In a large bowl, cream butter and sugar together until light and fluffy. Add eggs one at a time, mixing well between each addition. Add buttermilk. Add maple (or vanilla, or peppermint, or whatever kind of extract you want your cake to taste like, really!).
- Slowly combine the flour and sugar mixture.
- Bake for minutes, or until a toothpick inserted in the center comes out mostly clean. Allow cakes to cool for a several minutes, before transferring onto a wire rack.
Maple Buttercream Frosting
- Mix egg whites and sugar together in a small bowl. Place bowl over a pot with 1-2" of simmering water. Whisk constantly until the mixture is hot, reads 160°F on a candy thermometer, or is no longer graint to the touch. Approximately 3 minutes.
- Remove from heat and beat mixture on med-high until the meringue is stiff and cooled.
- Slowly add cubed butter and mix until smooth.
- Add maple extract.
Decorating & Assembly
- Once the cake has cooled, cut the cake into three 6" diameter circles -I used a small serving bowl as my guide. Save the rest of the cake mixture for cake pops (or enjoy it now, who am I to judge?). See how the pros do it here: https://sallysbakingaddiction.com/homemade-cake-pops/
- Place the bottom layer of cake on a serving tray. Top with approximately 1/4 cup of frosting, and repeat for each of layer. Crumb coat the cake and chill for minutes.
- Frost the sides of the cake. It doesn't need to be smooth, the texture helps create a more realistic birch tree! Also, the rougher texture helps hide blemishes, and accidental touch marks …which is perfect for cake noobs like myself.
- Place a small amount of gel food colouring into 3 individual, small dishes -one with black gel colouring, and two with brown. It's easy to over do it with color here, especially with black, so add a small amount at first. You can always add more later. Add a touch of hot water (½ tsp or less) into each dish, enough to thin the gel to make it easier to apply.
- Take ½ cup of frosting and place into a piping bag (or a ziplock with the corner cut off works just fine too). Mix in one of the brown gel food colorings. On the top of the cake, pipe in circles, starting at the center and working your way outwards to mimic the rings of a tree.
- Take a toothpick, or a unused paintbrust and paint on the patterns and lines of the birch tree with the remaining brown and black food coloring. Take a spatula to blend and smudge the lines for a more natural look.
- Add your finishing touches! Twigs, pinecones, figurines, or a hand 'carved' heart.
That’s all there is to creating a birch tree cake! Trust me, if an absolute noob like me can do it, so can you!
Health & Happiness,
Savannah